A rookie may find it difficult to jump-start their automobile, but with the appropriate information, it can be done quickly and without a hitch. In this post, you’ll learn how to jump-start your automobile using the jnc660 jump starter.
How to Start A Car With A Jumper Starter
When purchasing a new vehicle, be sure to read the owner's handbook first! If your car has a positive ground, you'll need to follow a separate set of jump-starting procedures. Jump-starts are also prohibited by several car manufacturers.- Put on safety clothes and goggles.
-
Never place your face near the battery and remove any jewelry.
-
If you have something flammable with you, make sure the car isn’t near it.
-
You should keep your charger at least six feet away from your battery.
-
Consult your battery charger’s owner’s handbook for information on its recommended operating voltage. Check to see whether the voltage matches that of the jump starter. This is a power supply that comes with at least twelve volts.
-
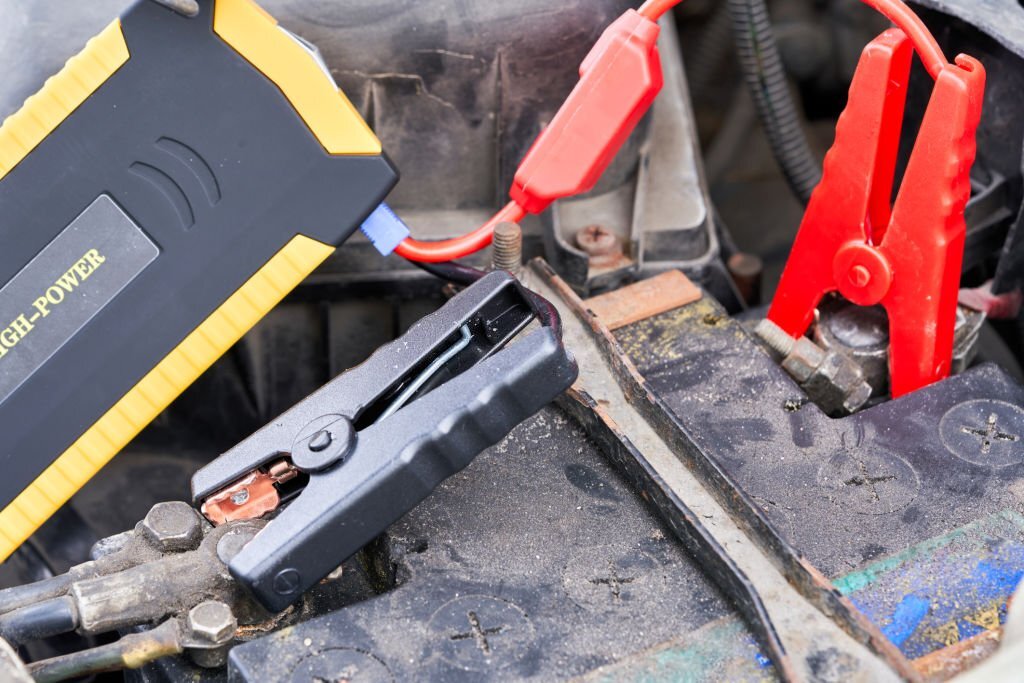
Always look for the positive and the negative signals on your automobile battery by looking for the “P,” “POS,” or ”+” sign on each terminal. Before securing the wires, make sure the area is free of corrosion.
-
Find the clamps indicating the negative and positive connections. There are two types of charger clamps: a red one and a black one.
-
Before connecting the jumper cables to the vehicle’s battery, ensure that your jump starter is turned off.
-
Clamps should not be allowed to touch one another.
-
Jumper cables should be connected to the appropriate terminals while both your car and your jump starter are parked and turned off.
- Connect the positive battery terminal with the clamp that has a red color
- Finally, attach the clamp colored black to a metal that is clean and not moving. Ensure the connection is far away from the engine and fuel lines.
-
You can power on your device after the jumper wires are securely in position. Always check for connections.
-
You may now attempt to start the automobile.
-
No more than five seconds should be spent turning the key in the ignition. Wait roughly 2-3 minutes before trying again if the vehicle won’t start. If the vehicle still won’t start after four or five tries, you may need a new battery.
-
Turn off the vehicle and the jump starter first if you need to adjust the jumper clamps. Once you’ve done that, you may begin working on strengthening the link.
-
Turn off the jump starter once the engine is running.
-
As a result, you should remove the negative (black) clamp first, then the positive (red) clamp. Now, put away the portable jump starter in a secure location.
-
You can finally get rid of those obnoxious goggles.
-
After the clamps are removed, let the car idle for a few minutes before starting it up again. You may now safely return to your house.
-
It’s critical to recharge the jump starter as soon as you get back to your house after a trip. The majority of portable jump starters are AC-powered and may thus be used with a standard wall socket. Charge it for at least three hours. Some devices take 12-24 hours of charging time to reach full capacity.
-
Check your car battery at the local battery center, as well, to determine whether it needs to be replaced and how long it will last.